
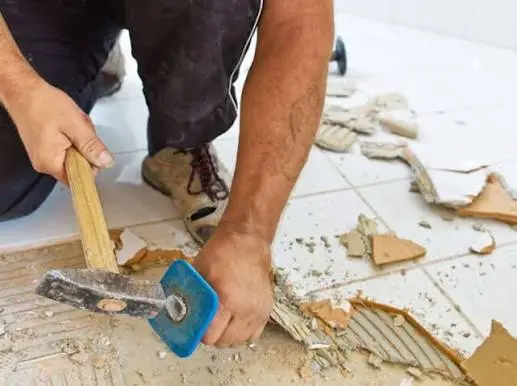
Tile removal looks simple until the first few tiles come up. Then you discover stubborn adhesive, an uneven substrate, dust finding its way into places you didn’t know existed, and a surprisingly large pile of heavy debris.
If you’re renovating a bathroom, kitchen, living area, or commercial space, removing the existing tiles properly can make everything that follows much easier. Here’s what the process actually involves and why preparation matters.
Tile Removal Is More Than Breaking Tiles
There’s a big difference between smashing tiles off a surface and preparing that surface for new flooring or finishes.
A proper removal job generally involves taking up the tiles, dealing with the adhesive underneath, removing debris, controlling dust, and leaving the substrate in a condition suitable for the next trade.
This is particularly important when you’re working to a renovation schedule. A tiler shouldn’t arrive expecting a ready floor only to discover thick patches of old adhesive or sections that still need demolition.
The cleaner the handover between trades, the easier it is to keep the project moving.
The Surface Underneath Matters
Before removal starts, it’s useful to know what’s beneath the tiles.
Floor tiles may be installed over concrete, screed, timber-based flooring, or other substrates. Wall tiles can be attached to masonry, cement sheeting, plasterboard, or specialised wet-area systems.
That underlying material changes how the tiles should be removed.
Using excessive force can damage a surface that could otherwise have been retained. On the other hand, being too cautious can turn a relatively straightforward job into days of unnecessary work.
Experienced tile removal specialists in Sydney can assess the existing installation and choose removal methods that suit both the tiles and the substrate underneath.
Adhesive Is Often the Hard Part
Getting the tiles off isn’t always the biggest challenge.
Once they’re gone, you’re usually left with adhesive or mortar bonded to the floor or wall. Depending on the age and type of installation, this material can be surprisingly difficult to remove.
Leaving large ridges behind can create problems when new flooring is installed. The finished surface may sit unevenly, additional preparation may be required, or the new installer may have to spend valuable time correcting the old surface.
This is why tile removal and surface preparation should be considered together rather than as two unrelated jobs.
Don’t Assume the Floor Will Be Perfectly Flat
Removing adhesive doesn’t automatically create a perfectly level substrate.
Cracks, depressions, damaged screed, previous repairs, and other imperfections may only become visible once the old finish is gone. Some of these issues may require separate repair or levelling work before new tiles or flooring can be installed.
Finding them early is still useful. It’s much better to discover a substrate problem during demolition than on the morning your new flooring is supposed to go down.
Dust Control Deserves Attention
Anyone who’s demolished tiles without proper dust control knows how quickly the mess spreads.
Breaking tiles and grinding adhesive can produce fine dust. Without sensible containment and extraction, that dust can move beyond the immediate work area and settle on furniture, cabinetry, windows, and other surfaces.
For an occupied home, this can be particularly frustrating.
Before work begins, consider which rooms need to be isolated, whether belongings should be removed, and how workers will move debris from the demolition area to the collection point.
Commercial sites have similar concerns, especially when neighbouring areas remain operational during the work.
Plan the Debris Route Before Starting
Tiles are heavy.
A relatively modest tiled area can produce a substantial amount of waste once you combine the tiles, adhesive, mortar, trims, and other removed materials.
Think about where that material is going before demolition begins.
If you’re renovating an apartment, for example, workers may need to move debris through common areas, lifts, corridors, or restricted access points. Houses can have their own challenges, including stairs, narrow side passages, landscaped areas, or limited vehicle access.
Planning the removal route beforehand reduces unnecessary handling and helps protect the rest of the property.
Watch for Unexpected Materials
Older buildings can hold surprises beneath later renovations.
Layers of previous flooring, unusual adhesives, old sheeting, waterproofing systems, or concealed repairs may appear once demolition begins. Some materials may need assessment before work continues.
This is one reason blindly attacking an old floor with demolition equipment isn’t a great plan.
If something unexpected appears, stop and identify it rather than assuming it’s harmless. This is especially relevant in older properties where building materials and installation practices may differ significantly from modern construction.
Coordinate Tile Removal With the Next Trade
One of the easiest ways to avoid renovation delays is to work backwards from the next stage.
Ask your tiler, flooring installer, builder, or other relevant trade what condition they need the surface to be in.
Do they need all the adhesive removed? Are they applying a levelling compound? Is waterproofing being replaced? Does part of the substrate need to remain untouched?
These details affect the demolition scope.
A clear scope also helps prevent the awkward situation where one contractor believes their job is finished while the next contractor says the area isn’t ready.
Bathrooms Need Extra Care
Bathroom tile removal deserves particular attention because several building systems can exist within a small space.
You’ve potentially got plumbing, drainage points, waterproofed areas, fixtures, electrical components, and wall linings all close to the demolition work.
If the bathroom is undergoing a full stripout, some of these elements may also be removed. If you’re only replacing selected finishes, however, anything being retained needs to be clearly identified before demolition starts.
Marking what stays and what goes might sound obvious, but it’s a useful precaution when several fixtures and finishes are involved.
Kitchens and Living Areas Bring Different Challenges
Kitchen tile removal may need to work around cabinetry, appliances, plumbing points, or splashbacks. In an occupied house, access through the kitchen can also affect daily routines.
Large tiled living areas create another issue: scale.
Removing a few square metres of bathroom tiles is very different from clearing a large open-plan floor. Equipment access, debris handling, dust containment, and working time all become more significant as the area increases.
That’s why it’s useful to measure the actual tiled area rather than describing a project simply as “one room.”
Preparation Makes the Next Stage Easier
Tile removal isn’t the glamorous part of a renovation. Nobody spends months choosing the perfect demolition finish.
But the quality of this early work affects what comes next.
A properly cleared area gives builders and finishing trades a much better starting point. It can expose hidden substrate issues early, reduce last-minute preparation, and make scheduling more predictable.
Before demolition starts, define exactly what’s being removed, identify anything that needs protection, plan how debris will leave the property, and confirm the surface condition required by the next trade.
Do that well, and tile removal becomes what it should be: a clean transition between the old space and whatever you’re building next.
Also Read
- CF Meaning in Text: What It Means in Chats, Social Media & Online Conversations (2026 Updated)
- 18+ Unique Similes for Life (2026) – Creative, Deep & Easy Examples
- TS Meaning in Text : Full Form, Uses, Examples & Social Media Trends (2026 Updated)